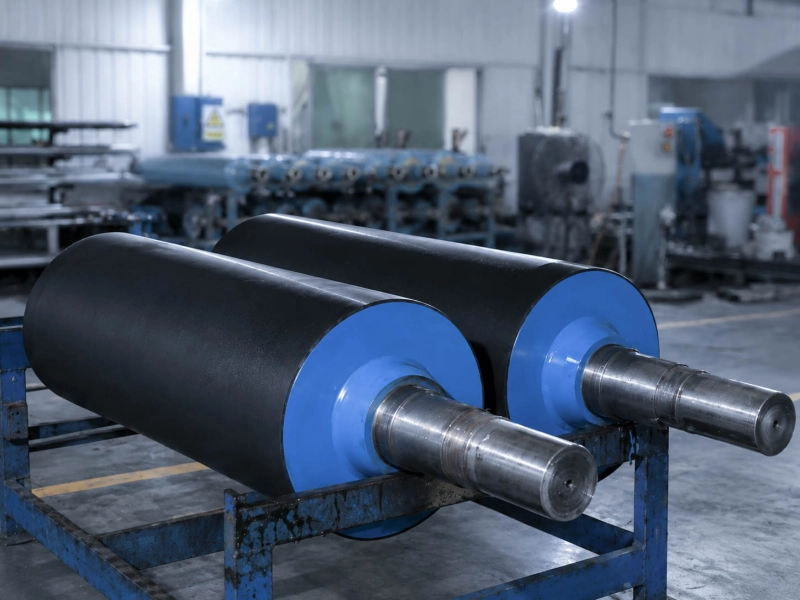
Transfer Rollers
Adhesive pickup, release, and transfer.

Low bond strength in flexible packaging laminates may affect the full web, one side, the edges, or only a few local areas.
The laminate may peel apart too easily. One edge may lift after slitting. A narrow weak band may remain in the same position across several rolls. In other cases, the laminate looks acceptable when it leaves the line but still fails after curing.
These patterns usually point to different parts of the process. Overall weakness is more often linked to adhesive preparation, coat weight, wetting, or curing. A fixed weak band or a clear edge-to-center difference makes transfer, metering, and nip contact more relevant.
Take samples from the left, center, and right side of the web. Use the same peel-test method and the same curing time for each sample.
The purpose is to see the pattern across the width.
| What you see | Where to start |
|---|---|
| Most of the width is weak | Adhesive mixing, coat weight, wetting, drying, and curing |
| One side is weaker | Cross-web coating, surface treatment, web position, or nip contact |
| Both edges are weaker than the center | Edge coating, wetting, surface treatment, or edge contact |
| One edge lifts after slitting or winding | Local contamination, poor edge transfer, or uneven nip contact |
| Small dry areas appear | Particles, local contamination, poor wetting, or unstable transfer |
| A weak band stays in one machine position | Metering, transfer, treatment profile, or roller condition |
| Bond remains low after curing | Mix ratio, curing, residual solvent, ink, or interface failure |
A single peel value from the center may look acceptable while one edge is already failing. Keep the test position and curing time with each result.
If most of the width is weak, start with the adhesive layer itself.
Check the adhesive batch, actual mix ratio, mixing method, and the time between mixing and coating. Then compare the real coat weight, drying condition, and curing history.
Using the correct adhesive product does not guarantee that the batch was prepared correctly. A ratio error, incomplete mixing, a long delay after mixing, or a change in adhesive condition can affect the full roll.
The machine setting also does not prove that the expected amount of adhesive reached the film. Actual coat weight may change during start-up, speed changes, stops, restarts, or adhesive replenishment.
If adhesive remains on both peeled surfaces but splits within the adhesive layer, mixing and curing should be checked before changing the nip.
Sometimes the adhesive amount is enough, but it does not spread properly over one surface.
If most of the adhesive stays on one side after peeling, while the other side looks clean or only partly covered, the weak point is probably at that interface.
The film may have entered the laminator on the wrong side. Surface treatment may be weak or may have dropped during storage. Dust, oil, moisture, slip additives, or poorly dried ink can also stop the adhesive from wetting the surface evenly.
Printed areas deserve a closer look. If the weak bond follows one ink color, one printed lane, or one film roll, the problem is more likely linked to the material or printing than to the full machine width.
Surface-treatment readings can help, but they should match the actual weak area. The peeled surfaces usually show more clearly where the bond failed.
For rollers that directly touch adhesive, ink, solvent, or cleaning liquid, check whether the roller surface has become sticky, swollen, shiny, or difficult to clean. These changes can affect adhesive pickup and release.
See Rubber Rollers for Ink, Adhesive, and Solvent Contact for the separate material-contact review.
When one side is consistently weaker, something is changing across the machine width.
Compare the weak side with the coat-weight profile, surface treatment, web position, nip pressure, temperature, and nearby roller condition.
If the weak band stays on the same machine side after changing the film roll, check the coating, metering, transfer, and nip areas on that side.
If the weak area moves with the film roll or printed lane, check the film, ink, and treated surface first.
Metering and transfer rollers become important when the weak band lines up with a fixed position on the roller face.
Dried adhesive, local contamination, uneven wear, scratches, or one edge running differently from the other can disturb the adhesive layer. A roller may still look usable while one part of its surface no longer picks up or releases adhesive evenly.
If the roller controls adhesive amount, check the Metering Rollers position.
If the roller picks up and transfers adhesive to the web, check the Transfer Rollers position.
Edge lift often becomes visible after winding, storage, slitting, or bag making. The later step may expose the problem, but the weak bond may have formed earlier.
Check whether the problem affects one edge or both, whether it stays on the same machine side, and whether it follows the same slitting lane. Also note whether it remains close to the coating edge or appears only in printed areas.
Compare the edge with the center. The edge may be receiving less adhesive. Wetting or surface treatment may also be weaker there. Contamination, unstable web position, lower edge pressure, or lower edge temperature can create the same result.
If the weak edge changes after pressure adjustment, inspect the local nip area.
The Pressure Rollers should provide even contact across the working width. Uneven loading, poor alignment, one-sided wear, or damage on the rubber surface can leave one edge with less effective contact.
Increasing pressure across the full width is not always the answer. If only one side is weak, the center may already be running normally.
Local dry spots usually come from a local interruption rather than a problem affecting the full width.
A regular repeat distance often points to a rotating surface. A narrow band that stays in one width position is more likely connected with metering, transfer, surface treatment, or roller contact. Random spots are more often linked to particles, contamination, or poor local wetting.
The timing also helps. Dry spots that appear after a restart may come from unstable adhesive supply. If they improve after cleaning and then return, dried adhesive or contamination on a transfer surface is worth checking.
If adhesive build-up is affecting transfer, see Material Sticking to Rubber Roller Surfaces.
When the laminate remains weak after curing, check the real curing history rather than the planned setting.
The actual storage temperature, time between lamination and testing, adhesive mix record, drying condition, residual solvent, and ink drying all matter.
The peeled surfaces can narrow the direction.
If most adhesive stays on one side, check wetting, surface treatment, contamination, ink, and the weaker interface.
If adhesive stays on both sides but splits in the middle, check the mix ratio, mixing quality, working time, curing, and residual solvent.
If the ink layer separates, the problem is closer to ink drying or ink adhesion. More nip pressure will not repair a weak ink layer.
If the film tears before the bond releases, the bond at that position may already be stronger than the film itself.
Rubber rollers deserve a closer look when the weak area matches a metering, transfer, or nip position.
At the metering and transfer stations, the roller surface affects how adhesive is picked up, carried, and released. Dried adhesive, local wear, surface damage, or uneven hardness can leave more adhesive in one area and less in another.
At the lamination nip, the rubber cover affects how pressure spreads across the web. Hardness, alignment, surface condition, temperature, and wear all change the actual contact.
A swollen or softened cover can change the roller diameter and nip shape. Uneven grinding or wear can make one side carry more load. A shiny or contaminated surface can also change adhesive release and web contact.
Two rollers may both be specified as NBR, EPDM, silicone, or polyurethane and still run differently because the compound, hardness, bonding, grinding, and final surface are different.
For a straightforward replacement, the existing drawing, dimensions, hardness, roller position, and old roller photos may be enough.
If the same bond problem keeps returning, the roller review should also include adhesive or solvent contact, operating temperature, pressure, speed, surface condition, and the way the old roller failed.
See Coating and Laminating Line Rollers for the common transfer, metering, and nip positions used on these lines.
A short production record is usually enough.
Keep the left, center, and right peel results, curing time, peeled-surface photos, adhesive batch, mix ratio, coat-weight information, and the exact position of any edge lift or dry spots.
For roller-related checks, add the roller position, dimensions, hardness, surface condition, and photos of wear, contamination, swelling, or damage.
Change one main condition at a time. Otherwise, even an improved result may not show which change actually helped.
Adhesive pickup, release, and transfer.
Adhesive amount and cross-web control.
Nip pressure and cross-width contact.
Roller positions used around coating and lamination.
Rubber material under liquid and chemical contact.
Adhesive build-up and recurring contamination.
If the problem points to a transfer, metering, or nip roller, send the roller drawing, dimensions, hardness, surface photos, and working position.
Photos of adhesive build-up, uneven wear, swelling, edge damage, or polished areas are also useful.
If you already have drawings, sizes, samples, or a clear specification, you can send them to Wolorin directly. We can proceed with custom manufacturing, quotation, or production confirmation based on your documents.
If the information is not complete yet, start with the roller position, laminate structure, adhesive contact, and the problem seen on the line.