Film Lamination Air and Clarity Defects: Bubbles, White Spots, and Haze

Large bubbles between laminated films are usually easy to recognize. Micro-bubbles, white spots, cloudy areas, and haze are harder because they do not always come from the same cause.

The first useful check is to look at the defect itself. Note its size, where it appears across the web, whether it is visible immediately or only after curing, and whether it changes with speed, pressure, temperature, or tension.

These details usually show whether the first check should be air removal, wetting, adhesive coverage, curing, or nip contact.

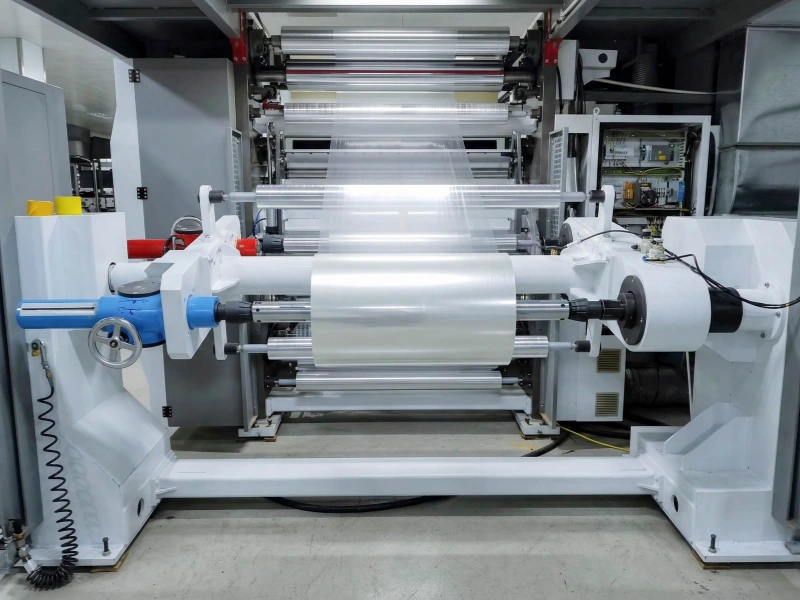
Clear plastic film being rewound on an industrial roller line

Start with the Defect Appearance

Large Bubbles

Large bubbles have a clear edge and a visible air pocket between the films.

They often point toward trapped air when they appear directly after lamination, increase at higher line speed, or stay concentrated near one side of the web.

Look at how the two films enter the nip. Wrinkles, flutter, uneven tension, or one side closing earlier can carry air into the contact point. Air must have a way to leave before the films fully meet.

More nip pressure may make the bubble look smaller, but it will not correct unstable web entry.

Micro-Bubbles

Micro-bubbles appear as many fine points rather than a few large pockets. Under reflected light, the film may look grainy, pale, or slightly sparkling.

If they are already visible at the nip exit, air removal, wetting, and adhesive coverage should be checked first. If they appear later, adhesive mixing, moisture, and curing conditions become more relevant.

In some printed-film applications, this sparkling appearance may be called silvering. For flexible packaging, it is still more useful to describe what is actually visible: micro-bubbles, white spots, or haze.

White Spots and Cloudy Areas

White spots are not always round bubbles. They can also form where the adhesive has not fully wetted or filled the film surface.

Compare printed and unprinted areas, heavy and light ink coverage, smooth and textured surfaces, and different film or ink batches.

If the white spots follow the print pattern, wetting and adhesive coverage should be checked first. If a cloudy band stays in the same cross-web position, look for a stable difference in adhesive distribution, temperature, contamination, or nip contact.

Haze

Haze is a wider loss of clarity. Instead of separate bubbles, the laminate looks milky or cloudy over a larger area.

Full-width haze is more likely to involve film surface condition, adhesive behavior, broad wetting, or curing.

When one side is noticeably worse, compare side-to-side web entry, adhesive distribution, temperature, and nip contact.

Immediate Defects and After-Cure Defects

Inspect the same roll directly after lamination and again after the normal curing period. Similar lighting and the same cross-web position make comparison easier.

A defect visible directly after lamination was usually created before or inside the nip. Air entering with the web, wrinkles or flutter before contact, poor wetting, incomplete adhesive coverage, and uneven nip contact are the main directions to check.

If the defect changes immediately when speed, tension, or nip pressure changes, it is closely linked to the running condition at that moment.

A laminate can also look clear on the machine and develop bubbles or haze several hours later. In that case, compare the adhesive batch, mix ratio, working time, moisture exposure, printed-film condition, curing temperature, and storage conditions.

Gas can form during the adhesive reaction. Poor initial wetting can also become more visible after curing.

A defect that begins only after storage is unlikely to be corrected by changing the nip roller alone.

Main Causes to Compare

Air Entrapment

Air entrapment is more likely when bubbles appear directly after the nip, become worse at higher speed, remain near one edge, or follow web flutter and wrinkles.

A practical test is to reduce the speed without changing other settings. If the bubbles improve, the line may not be giving the air enough time to escape.

Poor Wetting

Poor wetting happens when the adhesive does not spread into full contact with the film, ink, coating, or treated surface.

It often shows up as white spots over printed or rough areas. The actual contact side matters, so record the treated, printed, coated, and adhesive-contact sides of each film. The film name alone does not describe the full surface condition.

Uneven Adhesive Coverage

If the adhesive layer is too thin in one area, or uneven across the width, it may not fully fill the surface.

White spots over heavy print, edge-to-center differences, stable cloudy bands, and the same defect position repeating across several rolls all support this direction.

The coating path may include metering rollers and transfer rollers. If the defect stays in one cross-web position, check the full adhesive path before assigning it to one roller.

Measured coat weight is more useful than the machine setting alone.

Gas Formation

Gas-related defects usually appear after winding rather than directly at the nip.

Check adhesive mixing, working time, moisture, film and ink condition, curing temperature, and storage. The strongest signal is a laminate that looks acceptable at first and changes later.

Use Machine Changes as Clues

Speed, pressure, temperature, and tension can help narrow the cause, but only when they are changed one at a time.

What Changes What It May Show
The defect gets worse at higher speed Less time for wetting and air removal, or less stable web entry
The defect changes immediately with nip pressure Nip contact is affecting the result
The defect appears mainly during startup Temperature has not reached a stable condition
The defect begins after long hot running Adhesive or roller-surface condition may be changing
One side changes with tension adjustment Web entry or side-to-side tension is involved
Speed has little effect Check print pattern, adhesive batch, curing, contamination, or a fixed cross-web difference

Changing several settings together may improve the defect, but it will not show which change actually helped.

When the Nip Roller and Rubber Cover Should Be Checked

The nip roller becomes worth checking when the defect clearly follows the contact point.

Strong signs include an immediate response to nip-pressure changes, one side or one cross-web band staying worse, the problem starting after roller work, cleaning helping only for a short run, or the surface showing adhesive residue, glazing, scratches, swelling, or uneven wear.

The roller should be checked as part of the whole nip. The mating roller, loading, alignment, temperature, and web entry all affect the contact.

Rubber Hardness and Contact Width

A softer rubber cover normally creates a wider contact area. A harder cover normally creates a narrower contact area under a similar load.

Neither is automatically better.

The suitable hardness depends on film structure, roller diameter, cover thickness, working load, temperature, and surface sensitivity.

If the cover is too hard, the nip may be too narrow and less able to follow small thickness or alignment differences. If it is too soft, the cover may deform too much, build heat, or change the way the films pass through the nip.

The actual contact across the full working width matters more than the hardness number alone.

Side-to-Side Contact

If bubbles, white spots, or haze stay stronger on one side, check whether the roller contacts evenly from edge to edge.

Roller parallelism, loading on both sides, deflection under pressure, temperature across the roller face, and contamination near one edge can all create a side-to-side difference.

A roller can look normal when stopped and still contact unevenly under working load.

Rubber Surface Condition

The rubber cover does not need to be badly damaged before it affects contact.

Dried adhesive, cleaning residue, glazing, fine scratches, or uneven grinding can change the way the film enters and leaves the nip.

If cleaning improves the defect and it returns after a short run, check where the residue is coming from and whether the rubber surface still releases and cleans properly.

For rollers in direct contact with adhesive, ink, solvent, or cleaning liquid, the rubber compound also matters. Swelling, softening, hardening, or stickiness can change both surface behavior and contact width.

The wider roller positions used in these lines are covered on the coating and laminating line rollers page. For direct adhesive and solvent contact, see rubber rollers for ink, adhesive, and solvent contact.

Quick Defect Comparison

What You See Check First
Large bubbles directly after lamination Air entry and web stability
Fine bubbles across a wide area Wetting, air removal, and adhesive coverage
White spots over printed areas Wetting and adhesive filling
Cloudy band in one width position Adhesive distribution, contamination, temperature, and nip contact
One side is worse Tension, alignment, loading, and roller contact
Film looks clear, then bubbles appear Adhesive reaction, moisture, and curing
Full-width haze Film surface, adhesive condition, wetting, and curing
Cleaning helps only briefly Rubber-surface contamination or adhesive build-up

What to Record

Record the defect type, approximate size, density, cross-web position, whether one side is worse, whether it follows a printed or rough area, and how it looks directly after lamination and after curing.

For the process, record the film structure and contact sides, adhesive type and batch, mixing and working time if available, measured coat weight if available, line speed, tension, nip setting, temperature, curing conditions, storage, and any recent changes in film, ink, adhesive, cleaning, or setup.

For the roller, record its position and main dimensions, rubber material and hardness if known, surface condition, full-face and edge photos, visible residue, glazing, scratches, swelling, wear, and whether the problem started after roller maintenance or replacement.

For wider coating and lamination issues such as sticking, transfer lines, wrinkles, or surface marks, see common coating and laminating defects.

Send Drawings or Roller Details

Before replacing the roller, check whether the defect follows the nip position, changes with pressure, stays on one side, or returns after cleaning.

If the signs point toward the lamination roller, send the roller drawing or main dimensions, roller position, known rubber material and hardness, photos of the full face and both edges, and the current speed, nip setting, temperature, and tension. A short description of when and where the defect appears is also useful.

If you already have drawings, sizes, samples, or a clear specification, you can send them to us directly. We can proceed with custom manufacturing, quotation, or production confirmation based on your documents.

If the information is not complete yet, start with the roller position, laminate structure, contact medium, and defect photos.