
Corrugated Board Glue Application Problems: Uneven Glue Film, Dry Spots, and Squeeze-Out
A corrugated glue problem often appears as a simple board defect: dry flute tips, weak bonding, wet glue lines, or starch squeezed outside the contact area. On the machine, the same board may show two opposite signs at the same time. One lane looks short of glue. Another lane looks too wet.
The useful starting point is the glue transfer path. Starch adhesive must sit in a stable film on the glue roll, pass through the metering area, touch the flute tips, and stay controlled when pressure brings the liner and medium together.
When one part of that path becomes unstable, the board shows it quickly.
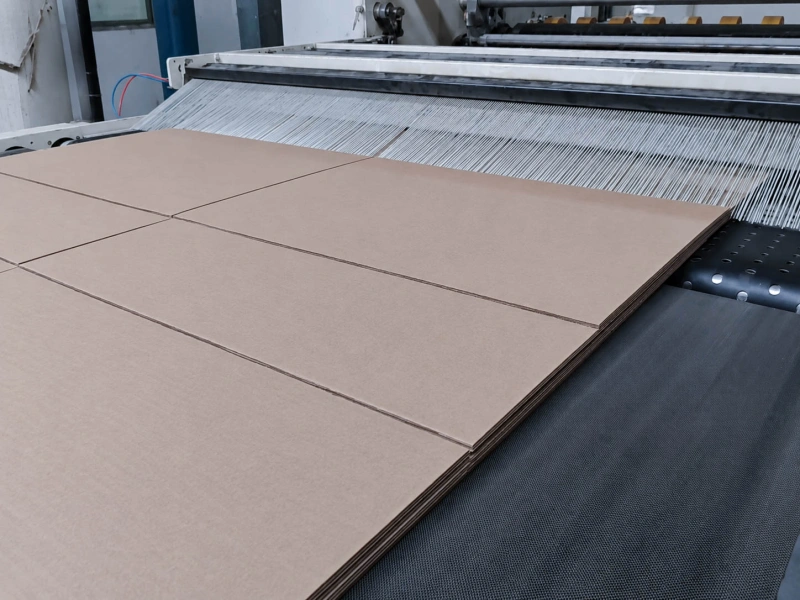
Read the Board Before Changing the Machine
The board usually gives the first clue.
Dry spots mean some flute tips did not receive enough usable adhesive. The glue may be too light, the film may be broken, the flute tip may not be touching cleanly, or the running speed may be too fast for stable transfer.
Squeeze-out means too much glue reached the contact area, or pressure pushed the glue outside the flute tip. Wet or soft paper can make this more visible.
Uneven glue film across the width often appears before the pressure contact. One side may carry a heavier film while the other side runs light. This usually points to gap, metering, roll condition, paper moisture, or side-to-side pressure difference.
| Board Sign | First Area to Check |
|---|---|
| Dry spots on certain flute lanes | Film thickness, flute tip contact, speed |
| Glue squeezed outside the flute tip | Film amount, pressure, paper moisture |
| One side wet and one side dry | Side-to-side gap, pressure balance, moisture difference |
| Dry lanes return after cleaning | Dried starch, build-up, roll surface condition |
| Problem appears after speed increase | Transfer time, film stability, starch flow |
Use the table as a sorting tool. After the likely area is clear, keep the next check close to that area.
Starch Condition Can Change the Same Roll Setting
The glue roll cannot create a stable film from unstable starch. When viscosity, temperature, gel condition, or circulation changes, the same roll gap can give a different board result.
Thin starch may look easy to run, but the film can become weak on the roll. It may break before all flute tips pick up enough glue. The board then shows scattered dry points or narrow dry lanes.
Heavy starch can load the roll too much. It may leave streaks, ridges, wet glue lines, or squeeze-out after pressure contact. If the glue becomes heavier during a long run, the board may slowly move from normal bond lines to messy wet areas.
Restart conditions also matter. After a stop, starch may cool, thicken, dry on exposed surfaces, or return unevenly through circulation. The first boards after restart can show heavy lines, missing glue, or dirtier transfer.
Useful production notes are short:
- viscosity and temperature when the defect appears;
- whether the issue starts after restart;
- whether it grows after long running;
- whether a fresh batch behaves differently;
- whether higher speed creates more dry spots;
- whether heavier starch creates more squeeze-out.
These notes help decide whether to continue with starch control or move to the glue roll, metering, flute contact, or pressure area.
Glue Roll and Metering Gap Control the Film Before the Board Sees It
The glue roll carries the starch film. The metering roll or doctor area trims that film before the flute tips touch it. When this part is unstable, the board often shows a clear cross-machine pattern.
A typical case is one side wetter than the other. The operator side may show squeeze-out while the drive side shows dry tips. The starch may be acceptable, but the film thickness across the roll face is different.
Another common case is a dry lane that returns after cleaning. Cleaning removes dried starch for a short time. Once the same area loads up again, the dry lane comes back. This points to local build-up, blocked surface, damage, or a roll surface that is holding residue.
Check the simple items first:
- Is the gap close from operator side to drive side?
- Does a small gap change make the board swing from dry to wet?
- Does dried starch stay in the same area?
- Is the roll surface scratched, dented, worn, or blocked?
- Did the problem start after roll grinding, replacement, cleaning change, or bearing work?
- Does the mark or dry lane repeat with roll rotation?
For adhesive pickup and transfer positions, Transfer Rollers are the main roller direction to review. For glue amount control and film thickness, Metering Rollers are the closer reference.
The decision should come from the board pattern. If changing the gap changes the defect immediately, stay in the metering area. If cleaning helps briefly and the same lane returns, look harder at the roll surface and residue behavior.
Flute Tip Transfer Is Where Many Wrong Adjustments Start
Corrugated glue application has one special point that ordinary coating does not have: the adhesive must transfer to flute tips.
The flute tip contact is narrow. A small contact change can create a large board change. Too little contact leaves dry tips. Too much contact pushes glue outside the target line. Uneven contact across the width makes one side dry and the other side wet.
Paper moisture changes this contact. A dry medium can pull water from the starch quickly and shorten the useful bonding time. A wet or soft medium can accept too much pressure and show more squeeze-out. A paper change can make yesterday’s gap look wrong today.
Pressure also changes the visible result. More pressure can close some dry spots, but it can also create squeeze-out. Less pressure can clean up wet lines, but it may open dry areas. For pressure-sensitive changes, Pressure Rollers and the contact area should be checked together.
Read the pattern this way:
- dry tips on certain flute lanes: check local flute contact and glue pickup;
- dry tips across a wider area after speed increase: check film stability and transfer time;
- squeeze-out after pressure increase: reduce the pressure question before changing more starch variables;
- different behavior after paper change: compare liner and medium moisture, flute condition, and preheat state;
- one side consistently different: compare gap, pressure, and paper moisture across the width.
For broader paper handling context, Paper Converting Rollers can support related roller-position checks. This article stays on the glue application area: starch film, flute tip transfer, pressure contact, and the rolls directly involved in that zone.
Cleaning Response Tells You More Than a Clean Surface Photo
A clean roll photo is useful, but the cleaning response is more useful.
If cleaning improves the board and the same defect returns soon, the issue is active during production. Dried starch, paper dust, adhesive residue, blocked cells, surface scratches, or a poor release surface may be collecting material again.
If cleaning gives no change, the main cause may sit elsewhere: starch condition, gap, pressure, paper moisture, flute contact, or roll alignment.
If cleaning helps only on one side, compare build-up across the roll face. One side may receive more adhesive, carry more residue, or run with a different contact load.
For repeated adhesive build-up, the guide on Material Sticking to Rubber Roller Surfaces can help connect residue behavior with roll surface condition and cleaning method.
Good photos for a roller check include:
- full roll face before cleaning;
- close-up of the dry lane or heavy glue area;
- both roll edges;
- surface after cleaning;
- any scratch, dent, swelling, cracking, sticky area, or uneven wear.
These photos help Wolorin understand the roller-related part of the problem. They do not replace the plant’s own process setting records.
When Wolorin Should Look at the Roll
Wolorin is a rubber roller manufacturer and custom roller supplier. For corrugated glue application problems, the roller becomes worth reviewing when the symptom keeps pointing back to a roller position or roller surface.
Good reasons to review the roll include:
- dry lanes stay in the same width position;
- one side stays wetter or drier after normal process adjustment;
- cleaning helps, then the same issue returns;
- small gap changes create large glue changes;
- the problem begins after roller replacement, grinding, re-covering, or bearing work;
- the roll surface shows dried starch, scratches, dents, swelling, hard spots, cracking, sticky areas, or uneven wear;
- the existing roller has no clear drawing, material record, hardness record, or surface specification.
For rubber-covered rolls in starch adhesive, water, or cleaning-liquid contact, material name alone is not enough. An old nitrile-covered roll that has worked well for years can be a practical starting point. If the old cover became sticky, swollen, cracked, hard, or difficult to clean, the replacement direction should be checked through the real contact condition.
NBR / Nitrile Rubber Rollers may be a common direction for many water, oil, adhesive, and general liquid-contact positions, but final selection should match the roller position, contact medium, cleaning method, pressure, surface requirement, and old roller condition.
Where dimensions, surface finish, hardness, runout, or inspection records are important, Wolorin’s Quality Control page gives the related manufacturing and inspection background.
What to Prepare for a Glue Roll or Metering Roll Request
You do not need to prepare a full corrugator report. The useful information is the information that connects the current roller to the board symptom.
Prepare what you already have:
- roller drawing or main dimensions;
- old roller photos, including the full face, both ends, and worn areas;
- roller position, such as glue roll, metering roll, doctor area, pressure contact, or another position;
- contact medium, such as starch adhesive, water, cleaning liquid, paper dust, or other contact material;
- current rubber-related issue, such as sticking, swelling, cracking, hardening, fast wear, dry lanes, uneven glue transfer, or difficult cleaning;
- current rubber material and hardness if known;
- surface condition, such as smooth, engraved, worn, scratched, blocked, sticky, glazed, or uneven;
- board grade and flute type;
- dry spot, squeeze-out, or uneven glue location;
- glue roll / metering gap if available;
- line speed, pressure, viscosity, and temperature if available;
- what was adjusted, and what changed after adjustment.
More complete information is helpful, but incomplete information is still enough to start.
If you have drawings, dimensions, or old roller photos, you can send the details to Wolorin. We can help confirm roller specifications, replacement direction, quotation, or production preparation based on the information provided.
If you do not have much information yet, start with the roller position, old roller photos, contact medium, and the current roller-related problem.
Related Pages
Send Drawings or Roller Details
For corrugated board glue application problems, Wolorin can help when the issue is linked to the glue roll, metering roll, pressure contact, rubber cover condition, roller surface, or replacement roller specification.
Send drawings, dimensions, old roller photos, roller position, contact medium, current rubber material and hardness if known, and the current roller-related problem. Useful photos include the full roller face, both ends, worn areas, residue areas, cracks, swelling, sticky spots, scratches, dents, or uneven wear.
If you already have a clear specification, Wolorin can proceed with custom manufacturing, quotation, or production confirmation based on your documents.
If the roller details are incomplete, start with the old roller photos, main dimensions, roller position, contact medium, and the problem seen on the current roll.