
Nonwoven Thermal Bonding Defects: Weak Bonding, Over-Bonding, Stiffness, and Pinholes
Weak bonding, hard hand feel, shiny bond points, pinholes, or small damaged spots usually appear right after the thermal bonding or calender bonding section. The fastest useful check is to mark where the defect appears before changing the machine setting.
Full-width weakness, one-side weakness, one hard lane, random pinholes, and repeated pinholes point to different places. Once the defect map is clear, the review can move in order: incoming web, fiber blend, heat, pressure, line speed, calender pattern, cooling, then roller contact signals.
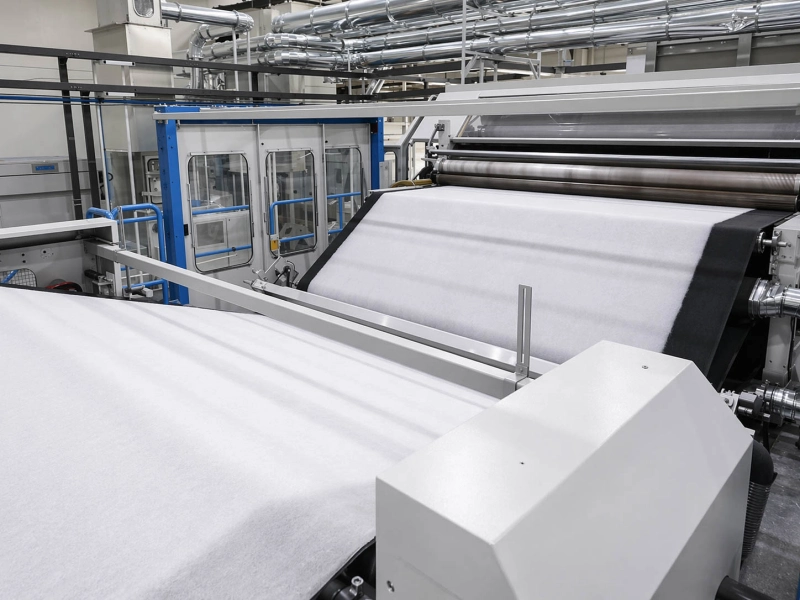
Start from where the defect appears
Thermal bonding fixes the web through heat and pressure. In point bonding, the patterned contact areas form small bond points. These bond points affect strength, softness, thickness, breathability, and surface feel.
Do the first separation on the product itself.
| Defect pattern | Better first direction |
|---|---|
| Weak bonding across the full width | Heat level, line speed, fiber blend, general pressure setting |
| Weak bonding on one side | Cross-width temperature or pressure difference |
| One weak lane or one hard lane | Local contact, local web thickness, pattern area, roll surface condition |
| Full-width hard hand feel | Too much bonding effect, long hot contact time, high pressure, cooling change |
| Random pinholes | Thin web areas, fiber clumps, dust, contamination |
| Repeated pinholes or repeated hard dots | Pattern point, roll surface spot, repeated contact mark |
This simple map prevents a common production mistake: raising heat for every weak-looking area. A weak full-width web may need more effective bonding. A weak lane may come from uneven contact. Random pinholes may come from the incoming web. Repeated pinholes may come from a pattern point.
For wider nonwoven roller positions outside the bonding section, Wolorin’s Nonwoven Processing Rollers page covers guiding, traction, pressure contact, slitting, rewinding, and related web handling areas.
Weak bonding: check whether the fibers had enough chance to lock
Weak bonding usually appears as loose fibers, poor peel strength, low tensile strength, weak lanes, or failure during later converting. The product may look acceptable at first, then open up during winding, slitting, handling, or use.
Read weak bonding by width.
Full-width weak bonding often comes from the bonding window. The fibers may need more effective heat, more stable pressure, slower line speed, or a different fiber response. If the web was recently changed to a different basis weight, supplier batch, bicomponent fiber ratio, or fiber blend, the old setting may no longer hold the structure well.
One-side weak bonding points more toward cross-width difference. The edge may receive less heat, less pressure, or less stable contact. Compare left, center, and right bond strength. Look at the bond point appearance under the same lighting. A weak side often looks slightly open, less defined, or less pressed than the normal side.
One-lane weak bonding needs a closer look at the lane itself. Check whether that lane was already thin, loose, dusty, or uneven before bonding. Then compare the lane with the calender pattern and roll surface position.
Useful checks for weak bonding:
- product strength before and after a speed change;
- bond point appearance across left, center, and right;
- incoming web thickness and thin lanes;
- fiber blend or bicomponent fiber change;
- temperature record across the heated area, if available;
- pressure or roll gap record, if available;
- whether the weak point repeats at the same distance.
Over-bonding and stiffness: check how much structure was locked
Over-bonding does not always look like damage. It often looks like a product that is too flat, too shiny, too dense, or too harsh. The web may pass strength testing and still fail customer acceptance because the hand feel has changed.
A hard full-width web usually means the bonding effect is too strong for the current material. The web may be staying too long in the hot contact area, receiving too much pressure, or cooling in a way that fixes a harsher structure.
A hard lane points toward local contact. Check the lane position against the calender pattern, pressure zone, and any surface build-up. If the hard lane started after a pressure adjustment or roll cleaning, the contact condition deserves attention.
Over-bonding often appears during:
- slow running;
- start-up and trial production;
- frequent stop-start operation;
- higher temperature settings;
- higher pressure settings;
- lighter or more heat-sensitive web changes;
- pattern roll changes or maintenance.
Stiffness should be compared with thickness and bond point appearance. A web that becomes thinner and harder after bonding usually received too much effective compression. A web that keeps thickness but feels harsh may be reacting more to heat, cooling, or fiber sensitivity.
Pinholes and local damage: separate random points from repeated points
Pinholes need a position map. Without the map, the same word can describe two different problems.
Random pinholes often start with the web. A thin spot, fiber opening, fiber clump, dust particle, oil spot, or hard contaminant can become a small hole after the web enters hot pressure contact. In this case, the same defect may appear in different places without a fixed distance.
Repeated pinholes point more toward repeated contact. Measure the distance between pinholes. Compare it with roll circumference, pattern layout, and the repeated position across the width. A damaged pattern point, local build-up, hard spot, or small surface defect can mark the web every revolution.
Local burned-looking spots deserve a heat and contamination check. Polymer residue, dust build-up, cleaning residue, oil, or local hot contact can create a small damaged point. If the spot appears after cleaning, maintenance, or a material change, compare the first roll-contact area after the defect begins.
A simple pinhole check works well:
- mark the machine direction distance between repeated holes;
- mark the cross-width lane;
- check incoming web under light before bonding;
- compare defect spacing with roll circumference;
- inspect the pattern point and smooth roll surface at the matching position;
- check for dust, fiber lumps, oil, residue, or cleaning chemical left near the contact area.
Read heat, pressure, speed, and cooling through production changes
The web reacts to the heat and pressure it actually receives during contact. The control screen gives settings. The product shows the result.
Line speed is often the missing link. Higher speed shortens contact time. Lower speed extends time in the hot contact area. During start-up, slow running, or stop-start operation, the same temperature setting can act more aggressively on the web.
Use recent changes to narrow the search.
| Recent change | Product change to watch |
|---|---|
| Speed increased | Weak bonding, loose fibers, poor peel strength |
| Speed reduced | Hard feel, shiny points, over-bonding |
| Temperature increased | Stiffness, shrinkage, pinholes, local damage |
| Pressure increased | Flattening, hard lanes, loss of loft |
| Cooling changed | Curl, uneven hand feel, shrinkage, edge change |
| Fiber blend changed | Same settings produce different strength or softness |
| Web basis weight changed | Thin areas damage more easily, thick areas bond unevenly |
Cooling matters when the product changes after leaving the hot zone. The web may look acceptable at the nip exit, then curl, shrink, or feel uneven downstream. Check cooling air, chill roll contact, web path after bonding, and tension after the hot section.
When roller contact should be checked
Thermal bonding and calender bonding may involve heated steel rolls, engraved calender rolls, smooth rolls, rubber-covered pressure or contact rolls, guide rolls, tension rolls, and cooling-side contact rolls.
Roller contact becomes a likely factor when the defect shows a clear contact pattern:
- the defect repeats at a fixed distance;
- one lane is always weak, hard, shiny, or damaged;
- the left, center, and right side show different bonding;
- the defect changes clearly after pressure adjustment;
- the defect appears after roll cleaning, grinding, polishing, replacement, or pattern roll maintenance;
- a rubber-covered roll near the bonding section shows glazing, hardening, swelling, sticking, build-up, uneven wear, or heat damage;
- the web slips, shifts, wrinkles, or enters the bonding area unevenly near a roller position.
For rubber-covered rolls near heated or loaded contact points, Rubber Rollers for Heat and Pressure Contact may help when heat, compression, release, and surface protection are part of the issue. If the concern is mainly controlled pressure contact, Pressure Rollers is the more relevant direction. If web entry is unstable before bonding, upstream Guide Rollers and Tension Control Rollers may be involved.
For flattened bands or fiber compression marks without a clear bonding-quality change, see Why Nonwoven Webs Show Pressure Marks.
What to record for a roller-related inquiry
For bonding defects, useful information should connect the product symptom with the roller position and contact condition. A long process report is usually less helpful than clear photos and accurate roller details.
Prepare what you have:
- drawings or dimensions of the rubber-covered roll;
- old roller photos, especially the surface, edges, wear areas, and shaft ends;
- roller position in the line;
- roll diameter, face length, shaft details, and current cover thickness if known;
- current hardness or previous roller specification if available;
- contact medium: hot web, fiber dust, polymer residue, cleaning liquid, oil, cooling moisture, or other material touching the roll;
- operating condition near the roll: temperature, pressure/contact load, speed, and cleaning method if known;
- current rubber roller problem: hardening, softening, swelling, sticking, surface build-up, uneven wear, slipping, marking, poor release, or heat damage;
- defect photos before and after the roller position;
- whether the defect repeats at a fixed distance or stays in one lane;
- recent roll cleaning, grinding, replacement, or setting change.
If you already have drawings, sizes, samples, or a clear specification, you can send them to Wolorin directly. We can proceed with custom manufacturing, quotation, or production confirmation based on your documents.
If the information is still incomplete, start with the roller position, old roller photos, main dimensions, contact medium, and the current rubber roller-related problem. That is usually enough for the first manufacturing discussion.