
Wound Roll Shape Defects: Telescoping, Dishing, Loose Edges, and Core Problems

A finished roll may have stepped layers, a curved face, loose edges, or a core that has moved inside the roll. Some problems show up while the roll is still winding. Others appear after unloading, transport, or storage.

Before changing settings, look at the roll face, note when the problem starts, and see which side moves.

If the problem starts close to the core, check the core and the first wraps. If it starts only after the roll gets larger, compare tension, torque, pressure, and material thickness across the width. If the roll changes after unloading, check how well the core and inner layers are holding the roll together.

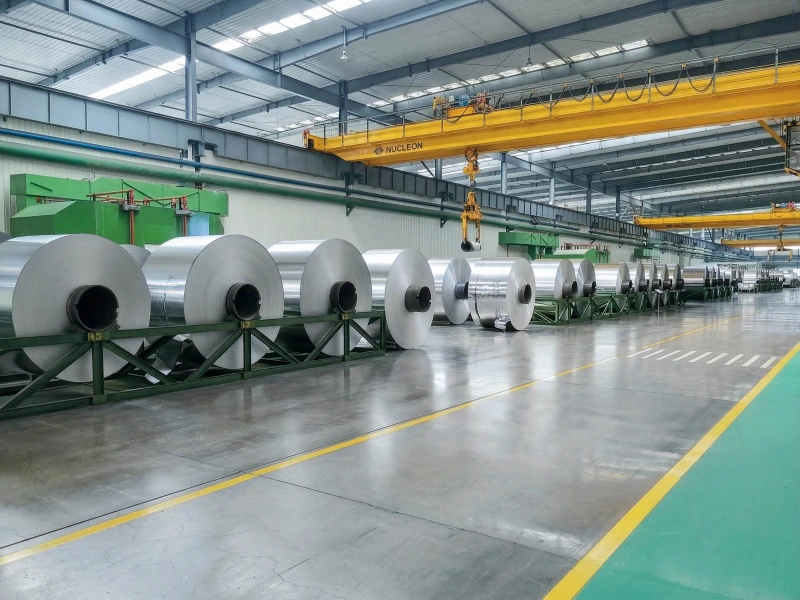
aluminum coil storage and processing workshop

What Does the Roll Face Look Like?

What you see Check first
Telescoping — the layers move sideways and one roll face sticks out Starting wraps, core holding, tension and torque changes, side pull, thickness across the web
Dishing — the roll face curves inward or outward Thickness across the web, core position, web entry angle, machine alignment
Loose edges — one edge looks soft, raised, feathered, or stepped Incoming edge condition, lane tension, starting wraps, local thickness difference
Offset or loose core — the core sticks out more on one side, turns, or moves Core ID, chuck or shaft fit, starting tension, first wraps
Core crush — the core becomes oval, buckles, or collapses Core strength, chuck expansion, unsupported length, lifting and stacking
The roll changes later — the roll looked acceptable on the machine but moved afterward Inner-layer stability, core support, unloading, transport, storage

Telescoping

A telescoping roll has layers that move sideways in steps. One face extends outward, while the other pulls inward. A severe roll may start to look conical.

If the shift starts near the core, look at the first wraps and how the core is held. If it starts later, check what changed as the diameter increased.

Dishing

A dished roll has a face that curves inward or outward instead of staying flat.

This often happens when one side of the roll builds faster or tighter than the other. Thickness variation, web angle, core position, and alignment are common places to start.

Loose Edges

A loose edge may feel softer than the center of the roll. It may also look raised, feathered, or uneven.

Check whether the edge was already loose before winding. If only one slit roll has the problem, compare that lane with the rolls beside it.

Offset or Loose Core

An offset core sticks out farther on one side. A loose core may turn or move inside the finished roll.

Check the core fit, chuck or shaft support, starting tension, and how the web was attached to the core.

Core Crush

Core crush may appear as an oval opening, a collapsed wall, or damage around the chuck area.

Start with the core itself. Look for moisture, old damage, poor fit, too much chuck expansion, or too much unsupported length.

The Roll Changes after Unloading or Storage

A roll may look straight while it is still on the winding shaft, then move after it is taken off.

Take a photo before unloading and another one afterward. If the shape changes again during storage, also check how the roll was supported, lifted, transported, and stacked.

When Does the Problem Start?

01

Near the Core

A problem that starts during the first wraps usually comes from the core, the web attachment, or the starting settings.

Check:

  • Core size and condition
  • Chuck or shaft fit
  • How the web was attached
  • Whether the first wraps were straight
  • Starting tension and torque

A weak start may stay hidden until the roll gets larger or is removed from the machine.

02

At a Larger Roll Diameter

If the face stays straight at first and moves later, check the settings at the diameter where the change begins.

Look for:

  • A tension or torque change
  • More air entering between the layers
  • A pressure change
  • Increasing side pull
  • Thickness variation building up through the roll
  • A speed change or splice near the same point

Write down the approximate roll diameter where the first step, curve, or loose edge appears.

03

Immediately after Unloading

If the roll moves when the shaft or chuck is released, the machine was helping to hold it in shape.

Check the core fit, inner layers, unloading method, and whether both sides were released evenly.

04

After Transport or Storage

If the roll moves hours or days later, check transport vibration, impact, storage temperature, stacking, and support.

A roll that was only just stable at the machine may move after the support condition changes.

Does Every Roll Move the Same Way?

If every roll moves toward the same machine side, check:

  • Web entry angle
  • Core position
  • Guide alignment
  • Winding-shaft alignment
  • Left and right contact

If the direction changes from one roll to another, compare how the cores were loaded, where the splice was located, and whether the material direction changed.

If only one slit roll has the problem, check that lane first. Look at its edge, thickness, core fit, and tension.

If the web is already moving sideways before it reaches the winding point, check the upstream path through Web Tracking Problems.

Check the Core before Changing Everything Else

The core carries the first wraps and supports the finished roll after unloading.

Check:

  • Core ID
  • Core wall condition
  • Straightness
  • Moisture or old damage
  • Fit on the shaft or chuck
  • Supported length
  • Core position

If the core is loose, damaged, or poorly supported, changing tension or pressure may not fix the roll.

A normal replacement is usually straightforward when the old core size and machine fit are already known. Repeated loose-core or core-crush problems need a closer look at support and starting load.

Compare Tension, Torque, and Lay-On Pressure

Tension is the pull in the moving web. Torque is the turning force that builds the roll. Lay-on pressure is the contact force where the web enters the growing roll.

Check how these values change as the roll diameter grows. Do not look only at the final settings.

A useful comparison is:

  • A normal roll and a defective roll
  • The same material on the same line
  • The diameter where the defect starts
  • Any setting change near that point

There is no single setting for film, paper, foil, laminates, and other web materials.

For tension-sensitive winding positions, see Tension Control Rollers. The main application page is Slitting and Rewinding Line Rollers.

The lay-on roller helps control air and keeps the layers in contact. Too little pressure can leave the outer layers loose. Too much can overload a weak core or disturb a sensitive material.

Check Pressure Rollers when changing pressure produces the same roll-face change each time.

Check the Thickness across the Web

A small thickness difference can become obvious after hundreds of wraps.

If one side is slightly thicker, that side builds diameter faster. The roll may then develop a raised edge, a curved face, or sideways layer movement.

When possible, compare the thickness at:

  • Operator side
  • Center
  • Drive side

Also check whether the problem started after changing the material, coating, lamination, or product grade.

If the defect changes sides when the material is reversed, look closely at the incoming web. If it always stays on the same machine side, check alignment and contact.

Check the Web Path and Alignment

The web should enter the winding point straight.

Check:

  • Core and winding-shaft position
  • Web entry angle
  • Roller alignment near the winding point
  • Guide roller rotation
  • Bearing drag
  • Dirt or wear on one side of a guide roller

A Guide Roller needs attention when the web is stable before that position and starts moving afterward.

Thin, smooth, coated, or surface-sensitive film can react to small path and contact differences. See Film Converting Rollers for related roller positions.

When Should You Check the Pressure or Guide Roller?

Check the roller when:

  • The defect changes after a pressure adjustment.
  • One side has a heavier contact mark.
  • One end of the roller is more worn, dirty, or polished.
  • The problem started after grinding, re-covering, alignment, or replacement.
  • Contact rises and falls as the roller turns.
  • The web path changes directly after one guide roller.

For a pressure or lay-on roller, check:

  • Outside diameter
  • Surface condition
  • Left and right load
  • Bearing condition
  • Alignment
  • Contact across the width

For a guide roller, check:

  • Free rotation
  • Bearing drag
  • Shaft position
  • Surface contamination
  • Web entry and exit angle

If the roller moves slightly in and out as it turns, the contact pressure can also rise and fall. Check the installed roller, bearings, journals, and mounting together.

For a standard replacement, drawings, dimensions, hardness, roller position, and old roller photos are usually enough to start. If the problem began after roller work, include photos of the roll face and roller contact.

What to Record

Start with:

  • Photos of both roll faces
  • Finished roll OD and width
  • Core ID and visible condition
  • Which side moves
  • When the problem starts
  • Web material and thickness
  • Whether one roll or every roll is affected

Add when available:

  • Tension and torque through the roll diameter
  • Lay-on pressure
  • Thickness across the web
  • Photos before and after unloading
  • Storage and transport condition
  • Roller dimensions and surface condition
  • Alignment or runout measurements
  • Recent roller repair or replacement information

Change one setting at a time when production allows. Compare the result at the same roll diameter.

Send Drawings or Roller Details

Send photos of both roll faces, the finished roll OD and width, core ID, web material, and a short note on when the problem starts.

If the issue appears to come from a pressure, guide, or winding-contact roller, also send its dimensions, surface condition, hardness if known, and any recent repair or replacement information.

If you already have drawings, sizes, samples, or a clear specification, you can send them to Wolorin directly. We can proceed with custom manufacturing, quotation, or production confirmation based on your documents.

If the information is incomplete, start with the roller position, finished-roll photos, and the problem on the line.